Yogasophy


Welcome to my tranquil oasis, where serenity meets strength.

Dive into the transformative world of yoga, on a journey to discover balance, peace, and well-being through mindful movement and breath.

Yoga
OM

Greetings! Namaste!

I am delighted to welcome you to my sacred space, a corner of the internet where the essence of my two-decade-long yoga journey unfolds. For the past 20 years, yoga has been my compass, guiding me through the ebb and flow of life with grace, resilience, and a profound sense of self-discovery.

My yoga odyssey began as a quest for physical well-being but evolved into a transformative exploration of mind, body, and spirit. Through countless sun salutations, serene moments in meditation, and the dance of breath and movement, I have discovered the art of balance, both on and off the mat.

This platform is an invitation to share in the wisdom (Sofia) and joy that yoga has bestowed upon me. It's a glimpse into my practice, a celebration of the connection between breath and movement and an offering of gratitude to the ancient teachings that have shaped my journey.

As we navigate this journey together, may you find inspiration, serenity, and a renewed sense of self. Whether you're a fellow traveler on the yogic path or a curious seeker taking your first steps, I invite you to breathe, flow, and embrace the transformative power of yoga by following my personal yoga curriculum.

Back to top

Warming up or preparatory movements

Before diving into a yoga session, it is important to warm up the body from head to toe. For this, you will do light rotations, starting with the neck and progressing through the shoulders, wrists, waist, knees, down to your ankles. The starting position is standing up, head straight, eyes looking straight ahead. Take a few deep breaths and enter a calm, relaxed mood.

Neck
  • Without arching your back, slowly move your head backward so you are looking upward. Return to the starting position and continue the movement downward to have your chin close to your chest. Repeat 10 times.
  • Lean your head left, then right. Repeat 10 times
  • Slowly turn your head left, then right. Repeat 10 times
  • Slowly rotate your head by leaning forward, turning right, moving back, turning left and down. Repeat 10 times then do the other direction too.
Shoulders
  • Slowly raise your shoulders up, move them forward, and let them down. Repeat this forward rotation 10 times
  • Slowly raise your shoulders up, move them backward, and let them down. Repeat this backward rotation 10 times
  • Raise your extended arms to the side and up above your head, then swing forward and down. Do 10 rotations.
  • Raise your extended arms to the front and up above your head, then bring them down sideways. Do 10 rotations.
  • Raise your arms in front and rotate the wrists ten times inside and ten times outside.
Waist
  • Stand with feet together and hands on the waist, rotate the upper body left, then right. Inhale when facing forward, exhale while turning left, inhale facing forward, and exhale while turning right. Repeat 10 times.
Ankles
  • Lift one foot with the toes pointing downward, rotate left 10 times, then rotate right 10 times. Repeat with the other foot.
Standing knee raises
  • Stand up straight with feet shoulder-width apart and place your hands on your hips.
  • Raise one knee up in front of you until your thigh is parallel with the ground without allowing your hips to twist.
  • Return to the starting position and repeat with the other knee.
  • Repeat 25 times per side.
Back to summary

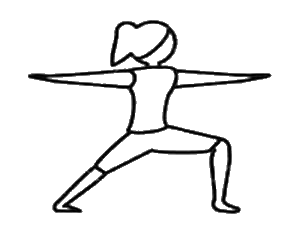
Warrior pose or Virabhadrasana

Warrior Pose, or Virabhadrasana, is a fundamental yoga pose that promotes strength, stability, and focus. Here's a short description of how to perform Warrior Pose:

  1. Starting Position:
    • Begin in a standing position at the front of your mat with feet hip-width apart.
  2. Step Back:
    • Take a step back with your left foot, keeping it at a comfortable angle (usually around 45 degrees) and ensuring the front foot points forward.
  3. Deep Lunge:
    • Bend your right knee, creating a deep lunge while keeping the knee directly above the ankle. Ground the outer edge of the left foot firmly into the mat.
  4. Extended Arms:
    • Extend your arms parallel to the ground, reaching actively in opposite directions. Palms can face down or come together in a prayer position at your chest.
  5. Gaze Forward:
    • Fix your gaze over the front fingertips, maintaining a steady and focused gaze.
  6. Strong Core:
    • Engage your core muscles to support the spine, and relax the shoulders away from the ears.
  7. Hold and Breathe:
    • Hold the pose for several breaths, maintaining a strong and grounded foundation. Inhale and exhale deeply, allowing the breath to bring strength and energy.
  8. Switch Sides:
    • To release, straighten the right leg and step the left foot forward to return to the starting position. Repeat on the other side.

Tips:

  • Ensure proper alignment by keeping the knee directly over the ankle in the bent leg.
  • Ground down through the outer edge of the back foot to maintain stability.
  • Keep the torso upright and avoid leaning forward or backward.
  • Modify the depth of the lunge based on your comfort and flexibility.

Warrior Pose symbolizes strength, courage, and focus, making it a foundational pose in many yoga sequences. Regular practice of Virabhadrasana helps build lower body strength, enhances balance, and cultivates a sense of inner power and resilience.

Warrior pose variation
Back to summary

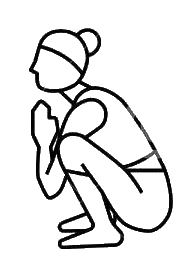
Squat pose or Malasana

Malasana, commonly known as the Squat Pose, is a grounding yoga posture that brings flexibility to the hips and strength to the lower body. Here's a short description of how to perform Malasana:

  1. Starting Position:
    • Begin in a standing position with feet slightly wider than hip-width apart.
  2. Lower into a Squat:
    • Lower your body into a squat position by bending your knees and bringing your hips down toward the ground.
  3. Feet Placement:
    • Position your feet either parallel or slightly turned outward, according to your comfort.
  4. Elbows Inside Knees:
    • Bring your elbows inside your knees, pressing your palms together in a prayer position.
  5. Straighten Your Spine:
    • Lengthen your spine, keeping your chest lifted, and engage your core for stability.
  6. Hold and Breathe:
    • Hold the pose for several breaths, allowing your body to open and relax into the stretch.
  7. Release:
    • To release, bring your hands to the mat and straighten your legs, returning to a standing position.

Tips:

  • Adjust the width of your stance to find a comfortable and stable position.
  • If your heels don't reach the floor, you can place a folded mat or blanket under them for support.
  • Keep the chest lifted to maintain an open heart and straight spine.
  • As a variation you can lift the heels off the ground and balance only on your toes.

Malasana is a beneficial pose for increasing flexibility in the hips, strengthening the lower body, and promoting a sense of grounding and stability.

Squat pose
Back to summary

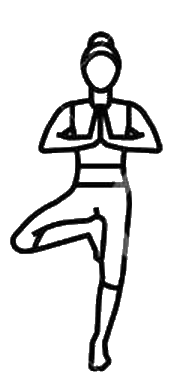
Tree pose or Vrksasana

Tree Pose, or Vrksasana, is a classic yoga pose that enhances balance, stability, and focus. Here's a short description of how to perform Tree Pose:

  1. Starting Position:
    • Begin in a standing position with your feet hip-width apart and arms by your sides.
  2. Shift Weight:
    • Shift your weight onto your right foot, rooting it firmly into the ground.
  3. Place Foot:
    • Place the sole of your left foot on the inner thigh or calf of your right leg. Avoid placing it on the knee.
  4. Hands:
    • Bring your palms together in front of your chest in a prayer position, or extend your arms overhead.
  5. Focus:
    • Fix your gaze on a point in front of you to help maintain balance and concentration.
  6. Hold and Breathe:
    • Hold the pose for several breaths, finding stability and relaxation in the standing leg.
  7. Release:
    • Slowly release the pose by lowering your left foot back to the ground. Repeat on the other side.

Tips:

  • Engage your core muscles for added stability.
  • Start with your foot on the calf and progress to the inner thigh as you gain confidence and balance.
  • Find a focal point to help with concentration.

Tree Pose is a wonderful posture for improving balance, strengthening the legs, and fostering a sense of calm and poise.

Tree pose
Back to summary

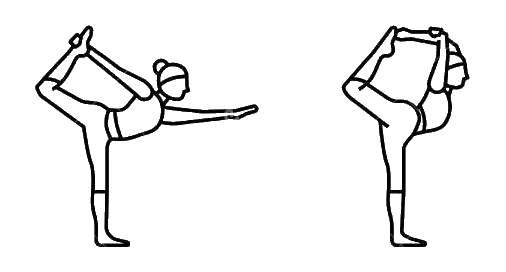
Dancer pose or Natarajasana

Dancer Pose, or Natarajasana, is an elegant yoga posture that improves balance, flexibility, and strength. Here's a short description of how to perform Dancer Pose:

Dancer Pose, or Natarajasana, is an elegant yoga posture that improves balance, flexibility, and strength. Here's a short description of how to perform Dancer Pose with the foot held extended backward:

  1. Starting Position:
    • Begin in a standing position with your feet together and arms by your sides.
  2. Shift Weight:
    • Shift your weight onto your right foot, grounding it firmly into the mat.
  3. Lift Leg:
    • Bend your left knee, bringing the heel toward your left buttock. Hold the inner ankle of your left foot with your left hand.
  4. Extend Leg Backward:
    • Begin to extend your left leg backward while keeping the torso and right arm reaching forward.
  5. Kick and Reach:
    • As you extend the leg backward, kick your foot into your hand, simultaneously reaching your right arm forward and up.
  6. Arch Back:
    • Allow your torso to hinge forward, arching your back and creating a heart-opening stretch as the extended leg reaches backward.
  7. Hold and Breathe:
    • Hold the pose for several breaths, finding balance and opening through the chest and shoulders.
  8. Release:
    • Slowly release the pose by lowering your left foot back to the ground. Repeat on the other side.

Tips:

  • Engage your core muscles to maintain balance.
  • Focus your gaze on a fixed point to help with concentration.
  • Start with a gentle kick and gradually increase the height as you become more comfortable.

Dancer Pose is a beautiful and expressive pose that enhances strength, flexibility, and poise.

Dancer pose
Back to summary

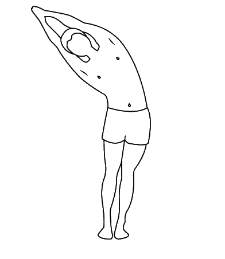
Half Moon pose or Ardha chandrasana

Ardha Chandrasana, or Half Moon Pose, is a balancing yoga posture that strengthens the legs, improves flexibility, and enhances focus. Here's a short description of how to perform Ardha Chandrasana:

  1. Starting Position:
    • Begin in a standing position at the top of your mat with your feet together.
  2. Mountain Pose:
    • Root your feet firmly into the mat, engaging the muscles of your legs. Stand tall with your arms by your sides.
  3. Reach Arms Above:
    • Inhale as you reach your arms overhead, bringing the palms together in a prayer position or keeping them parallel.
  4. Bend Left:
    • Exhale and gently bend your torso to the left, creating a lateral stretch along the right side of your body. Keep the arms extended and in line with your ears.
  5. Center:
    • Inhale to return to the center, bringing your torso back to an upright position with arms extended above.
  6. Bend Right:
    • Exhale and gently bend your torso to the right, feeling the stretch along the left side of your body. Maintain the extension of the arms.
  7. Return to Center:
    • Inhale to return to the center, aligning your torso upright with arms extended overhead.
  8. Repeat:
    • Continue flowing between the left and right bends, moving with your breath. Enjoy the sensation of lengthening and opening through the sides of your body.

Tips:

  • Engage your core for stability during the lateral bends.
  • Maintain a steady and smooth breath throughout the movement.
  • Feel free to deepen the stretch by bending a bit further as your body allows.

This variation of Ardha Chandrasana with lateral movements provides a dynamic way to stretch and energize the entire body.

Half Moon pose
Back to summary

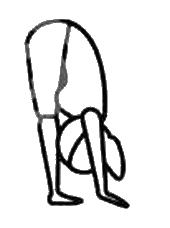
Stork pose or Padahasthasana

Stork Pose, or Padahasthasana, is a forward-bending yoga posture that promotes flexibility in the spine, stretches the hamstrings, and encourages a sense of grounding. Here's a short description of how to perform Stork Pose:

  1. Starting Position:
    • Begin in a standing position at the top of your mat with your feet hip-width apart.
  2. Mountain Pose:
    • Root your feet into the mat, engage your thighs, and stand tall with your arms by your sides.
  3. Inhale:
    • Inhale deeply, lengthening your spine and lifting your chest toward the sky.
  4. Exhale:
    • Exhale as you hinge at your hips, leaning your torso forward over your legs.
  5. Reach Down:
    • Reach your hands down towards the floor. You can either hold onto your shins, ankles, or bring your palms flat on the ground.
  6. Head Toward Knees:
    • Bring your head toward your knees, allowing your spine to lengthen and your neck to relax.
  7. Hold and Breathe:
    • Hold the pose for several breaths, feeling the stretch in your hamstrings and the release in your spine.
  8. Release:
    • To release, inhale and slowly roll up to a standing position, stacking each vertebra one at a time.

Tips:

  • Keep a slight bend in your knees if you feel tension in the hamstrings.
  • Engage your core for stability during the forward bend.
  • Let your head hang freely in the final position, allowing for a gentle neck stretch.

Stork Pose is a rejuvenating stretch that enhances flexibility and brings a sense of calm to the mind and body.

Stork pose
Back to summary

Eye exercise or Nethra Vyayamam

Nethra Vyayamam, or Eye Exercise, is a series of simple movements and techniques aimed at promoting eye health, reducing eye strain, and enhancing vision. Here's a short description of how to perform Eye Exercise:

  1. Palming:
    • Sit comfortably and rub your palms together vigorously to generate warmth. Cup your palms and place them gently over your closed eyes without applying pressure. Relax in this darkness for a minute, allowing your eyes to rest.
  2. Eye Rotation:
    • Sit or stand comfortably. Look up and rotate your eyes clockwise in a circular motion. Repeat this 10 times. Then, rotate your eyes counterclockwise for another 10 times. This helps improve flexibility and circulation in the eye muscles.
  3. Focusing Near and Far:
    • Hold your thumb about 10 inches in front of your face. Focus on it for a few seconds, then shift your focus to an object in the distance. Continue alternating between near and far focusing for about 10 times. This exercise helps to relax and strengthen the eye muscles.
  4. Blinking:
    • Quickly blink your eyes for 20-30 seconds. This helps to moisten the eyes and reduce dryness. Blinking is a natural way to refresh and lubricate the eyes.
  5. Figure Eight:
    • Imagine a large figure-eight (infinity symbol) in front of you. Trace the figure-eight with your eyes, following the shape in a smooth and controlled manner. This exercise improves eye coordination and control.
  6. Up and Down Movement:
    • Slowly move your eyes up and down, without moving your head. Repeat this motion for about 10 times. This exercise helps to stretch and relax the eye muscles.
  7. Side-to-Side Movement:
    • Move your eyes from side to side, maintaining a slow and controlled pace. Repeat this motion for about 10 times. This exercise enhances lateral eye movement and flexibility.

Tips:

  • Perform these eye exercises regularly to promote eye health and reduce eye strain.
  • Take breaks from screen time to rest your eyes and incorporate these exercises into your daily routine.
  • Practice the exercises in a well-lit room with good ventilation.

Nethra Vyayamam is a beneficial practice for maintaining healthy eyes and promoting overall well-being.

Back to summary

Face exercise or Kapol - Sakti - Vardhaka

Kapol Shakti Vardhaka, or Face Exercise, is a set of exercises designed to promote facial muscle strength, flexibility, and overall facial well-being. Here's a short description of how to perform Face Exercise:

  1. Smile and Release:
    • Begin by smiling widely, stretching your lips as far as possible. Hold the smile for a few seconds, then release. Repeat this process 10 times. Smiling exercises help tone the muscles around the mouth and cheeks.
  2. Forehead Lift:
    • Place your palms on your forehead with fingers facing upward. Apply gentle upward pressure with your hands, resisting the movement with your forehead muscles. Hold for a few seconds, then release. Repeat 10 times. This exercise helps reduce forehead lines and wrinkles.
  3. Cheek Puffing:
    • Puff your cheeks with air, holding the air inside for a few seconds. Move the air from one cheek to the other, creating a gentle massaging motion. Repeat 10 times. Cheek puffing exercises enhance blood circulation and promote a healthy glow.
  4. Lip Resistance:
    • Close your lips and place your index fingers on them. Apply gentle resistance as you try to open your lips against your fingers. Hold for a few seconds, then release. Repeat 10 times. This exercise strengthens the muscles around the lips.
  5. Eye Squinting:
    • Squint your eyes tightly, then open them wide. Repeat this squinting and opening motion 10 times. Eye squinting exercises help improve the strength and flexibility of the eye muscles.
  6. Neck and Jaw Stretch:
    • Tilt your head back slightly and bring your lower lip over your upper lip, stretching the neck and jaw muscles. Hold for a few seconds, then return to a neutral position. Repeat 10 times. This stretch helps reduce tension in the jaw and neck.
  7. Tongue Stretch:
    • Extend your tongue as far out as possible, reaching towards your chin. Hold for a few seconds, then retract the tongue. Repeat 10 times. Tongue stretches contribute to tongue muscle flexibility.

Tips:

  • Perform these face exercises regularly to maintain facial muscle tone.
  • Practice in front of a mirror to ensure proper technique.
  • Combine face exercises with a healthy skincare routine for overall facial well-being.

Kapol Shakti Vardhaka is a beneficial practice for enhancing facial muscle strength and promoting a vibrant appearance.

Back to summary

Tongue exercise or Simhasana

Simhasana, or Lion Pose, is a yoga posture that involves specific tongue exercises to release tension, improve facial muscle tone, and promote oral health. Here's a short description of how to perform Tongue Exercise within Simhasana:

  1. Sit Comfortably:
    • Find a comfortable seated position, either cross-legged on the floor or in a chair with your spine straight and shoulders relaxed.
  2. Place Hands:
    • Rest your hands on your knees or thighs, with palms facing downward.
  3. Inhale:
    • Inhale deeply through your nose, expanding your chest and abdomen.
  4. Exhale:
    • As you exhale, open your mouth wide and extend your tongue out towards your chin. Keep your mouth wide, and simultaneously open your eyes wide, looking upward. This is the preparatory position.
  5. Tongue Stretch:
    • Stretch your tongue out as much as possible, pointing it downward toward your chin. At the same time, roar or make the "ah" sound, allowing your breath to be audible.
  6. Hold and Release:
    • Hold the extended tongue position for a few seconds, feeling the stretch. Then, retract your tongue, close your mouth, and relax your facial muscles.
  7. Repeat:
    • Repeat this sequence for 5-10 rounds, focusing on the stretch and the breath. Feel the release of tension in your face and jaw.

Tips:

  • Perform this tongue exercise with a sense of playfulness and relaxation.
  • Ensure your shoulders are relaxed and your spine is straight throughout the practice.
  • Simhasana not only benefits the tongue but also helps alleviate tension in the face and throat.

Simhasana with its tongue exercises is a unique and refreshing practice to enhance oral and facial well-being.

Back to summary

Sun Salutation or Surya Namaskar

Surya Namaskar, or Sun Salutation, is a sequence of yoga poses performed in a flow to greet and harness the energy of the sun. It is a great way to start your day with a combination of physical exercise, stretching, and mindful breathing.

Instructions:

  1. Prayer Pose (Pranamasana):
    • Stand at the front of your mat with your feet together and palms pressed together in a prayer position.
    • Take a few deep breaths, centering yourself.
  2. Raised Arms Pose (Hasta Uttanasana):
    • Inhale, lift your arms overhead, and arch back slightly, keeping your biceps close to your ears.
    • Ensure your gaze is toward the ceiling.
  3. Forward Bend (Hasta Padasana):
    • Exhale, bend forward from your waist, and bring your hands to touch the floor beside your feet.
    • Keep your spine straight and head down.
  4. Lunge Pose (Ashwa Sanchalanasana):
    • Inhale, step your right leg back into a lunge position, with the knee touching the floor.
    • Lift your chest and gaze forward.
  5. Plank Pose (Dandasana):
    • Exhale, step your left leg back to come into a plank position, like the top of a push-up.
    • Keep your body in a straight line from head to heels.
  6. Eight-Limbed Pose (Ashtanga Namaskara):
    • Lower your knees, chest, and chin to the floor while keeping your hips elevated.
    • Your buttocks should be in the air.
  7. Cobra Pose (Bhujangasana):
    • Slide forward and raise your chest into a gentle backbend, keeping your hands below your shoulders.
    • Elbows should be slightly bent.
  8. Downward Facing Dog (Adho Mukha Svanasana):
    • Exhale, lift your hips, and push back into a downward-facing dog position.
    • Straighten your arms and legs, bringing your heels toward the floor.
  9. Lunge Pose (Ashwa Sanchalanasana):
    • Inhale, step your right foot forward between your hands, returning to the lunge position.
    • Gaze forward and lift your chest.
  10. Forward Bend (Hasta Padasana):
    • Exhale, step your left foot forward to meet the right and fold forward at the waist.
  11. Raised Arms Pose (Hasta Uttanasana):
    • Inhale, sweep your arms overhead, arch back slightly, and gaze up.
  12. Prayer Pose (Pranamasana):
    • Exhale, bring your palms together in front of your chest in a prayer position.
    • Take a moment to center yourself and feel the energy you've created.

Repeat the sequence, alternating the leg you step back with, for a complete round of Surya Namaskar. Start with a few rounds and gradually increase as per your comfort and stamina.

Sun Salutation
Back to summary

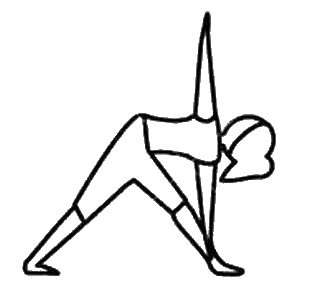
Triangle Pose or Trikonasana

Trikonasana, or Triangle Pose, is a standing yoga pose that helps improve flexibility, strengthen the legs, and stretch the spine. It also opens the chest and shoulders while promoting balance and stability.

Instructions:

  1. Starting Position:
    • Stand at the top of your mat with your feet hip-width apart.
    • Keep your arms by your sides and engage your core.
  2. Step Your Feet:
    • Take a step back with your right foot, keeping it at a 45-degree angle.
    • Ensure your left foot is pointing forward.
  3. Extend Your Arms:
    • Extend your arms out to the sides, parallel to the floor.
    • Shoulders should be relaxed, and palms facing down.
  4. Reach to the Left:
    • Shift your hips to the left as you reach your left hand forward.
    • Keep your torso extended and parallel to the floor.
  5. Touch the Ground or Shin:
    • Lower your left hand, either to the floor (outside your left foot), on a block, or your shin.
    • Extend your right arm directly above your shoulder, creating a straight line from fingertips to fingertips.
  6. Gaze Up:
    • Turn your head to gaze at your right thumb, creating a gentle twist in your neck.
    • Keep your neck in a neutral position if looking up causes strain.
  7. Hold the Pose:
    • Hold the pose for 30 seconds to 1 minute, breathing deeply.
    • Engage your core and maintain a strong connection between your feet and the ground.
  8. Return to Center:
    • To release, press through your feet and return to an upright position.
    • Repeat on the other side, stepping your left foot back and reaching to the right.

Triangle Pose is a wonderful stretch for the entire body, enhancing both strength and flexibility.

Triangle pose
Back to summary

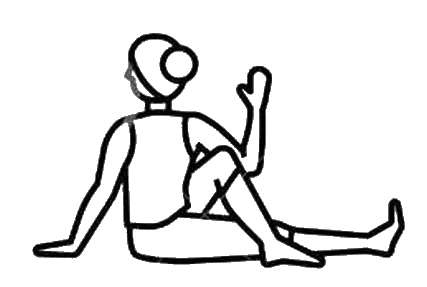
Spine twist pose or Ardha Matsyendrasana

Ardha Matsyendrasana, or Spine twist pose, is a seated twist that helps stretch the spine, shoulders, and hips. It also stimulates the digestive organs and improves flexibility in the spine.

Instructions:

  1. Starting Position:
    • Sit on the floor with your legs extended straight in front of you.
    • Bend your knees and place your feet flat on the floor.
  2. Prepare for the Twist:
    • Slide your left foot under your right leg to the outside of your right hip.
    • Place your right foot over your left leg, so your right knee points toward the ceiling.
  3. Set Up Your Hand Placement:
    • Place your left hand on the floor behind you for support.
    • Bring your right elbow to the outside of your left knee, creating a gentle twist.
  4. Lengthen Your Spine:
    • Sit up tall and lengthen your spine with each inhale.
    • Feel the twist deepening as you exhale.
  5. Gaze Over Your Shoulder:
    • If comfortable, turn your head to gaze over your left shoulder, deepening the twist in your neck.
    • Keep your spine long and your shoulders relaxed.
  6. Hold the Pose:
    • Hold the pose for 30 seconds to 1 minute, breathing deeply.
    • Feel the gentle compression in your abdominal area and the stretch along your spine.
  7. Release and Repeat:
    • Release the twist and return to the starting position.
    • Repeat on the other side by bringing your right foot under your left leg and twisting to the right.

Ardha Matsyendrasana is beneficial for enhancing spinal flexibility and promoting digestive health.

Spine twist pose
Back to summary

Root lock or Mula Bandha and Ashwini Mudra

Mula Bandha and Ashwini Mudra are yogic practices that involve engaging and contracting the muscles in the pelvic region. These practices help enhance stability, control, and energy flow in the lower part of the body.

Mula Bandha (Root Lock):

  1. Find a Comfortable Seat:
    • Sit in a comfortable cross-legged position or on a chair with your spine straight.
  2. Engage the Pelvic Floor:
    • Contract the muscles of the pelvic floor, as if you are stopping the flow of urine.
    • Engage both the anal and genital areas by lifting them upward.
  3. Hold and Breathe:
    • Hold the contraction for as long as comfortable while maintaining normal breathing.
    • Release and relax between contractions.
  4. Repeat:
    • Repeat the process, gradually increasing the duration of the contraction as you become more comfortable with the practice.

Ashwini Mudra:

  1. Assume a Comfortable Position:
    • Sit in a comfortable position with your spine straight.
  2. Focus on Anal Contraction:
    • Contract and relax the muscles of the anus in a pulsating manner.
    • Imagine drawing the anus in and then releasing it in quick successions.
  3. Control the Movements:
    • Practice controlling the contractions with your breath.
    • Start with a few rounds and gradually increase the duration and intensity.
  4. Release and Relax:
    • After completing the practice, sit quietly and observe any sensations in the pelvic region.
    • Take a few deep breaths before returning to your normal state.

Mula Bandha and Ashwini Mudra can be incorporated into your yoga practice to promote grounding, energy flow, and awareness in the pelvic area.

Seated Root Lock pose
Back to summary

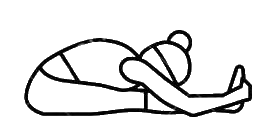
Seated Forward Bend pose or Paschimottanasana

Paschimottanasana, or Seated Forward Bend, is a yoga pose that stretches the entire back of the body, from the heels to the head. This asana is known for promoting flexibility in the spine, hamstrings, and calves.

Instructions:

  1. Starting Position:
    • Sit on the floor with your legs extended straight in front of you.
    • Ensure your spine is straight, and your toes are pointing towards the ceiling.
  2. Lengthen Your Spine:
    • Inhale and elongate your spine, lifting your chest towards the ceiling.
    • Engage your core muscles to support the lengthening of your spine.
  3. Forward Bend:
    • Exhale and hinge at your hips to bend forward from the waist.
    • Reach your hands towards your feet, keeping your back straight.
  4. Hold the Pose:
    • Hold the position for 30 seconds to 1 minute, breathing deeply.
    • Feel the stretch along your spine, hamstrings, and calves.
  5. Release and Repeat:
    • To release, inhale and slowly come back to the upright seated position.
    • Repeat the forward bend for additional rounds, gradually deepening the stretch.

Paschimottanasana is a calming pose that not only stretches the body but also brings a sense of relaxation and introspection.

Seated Forward Bend pose
Back to summary

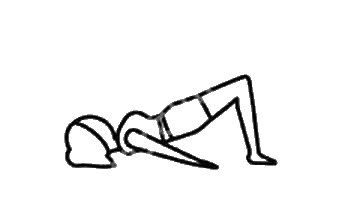
Bridge pose or Setu Bandhasana

Setu Bandhasana, or Bridge Pose, is a yoga pose that strengthens the legs, opens the chest, and improves spinal flexibility. This pose is also known for its ability to rejuvenate tired legs and relieve mild backaches.

Instructions:

  1. Starting Position:
    • Lie on your back with your knees bent and feet hip-width apart.
    • Place your arms alongside your body with palms facing down.
  2. Lift Your Hips:
    • Press through your feet and lift your hips towards the ceiling.
    • Engage your thighs and glutes to create a straight line from shoulders to knees.
  3. Clasp Your Hands:
    • Clasp your hands under your back and roll your shoulders underneath you.
    • Interlace your fingers and extend your arms, lifting your chest towards your chin.
  4. Hold the Pose:
    • Hold the position for 30 seconds to 1 minute, breathing deeply.
    • Keep your neck relaxed and gaze towards your chest.
  5. Release and Lower:
    • Release your hands and slowly lower your spine back to the mat.
    • Bring your knees to your chest and gently rock from side to side to release any tension.

Setu Bandhasana is a rejuvenating pose that not only strengthens the body but also brings a sense of openness and vitality.

Bridge pose
Back to summary

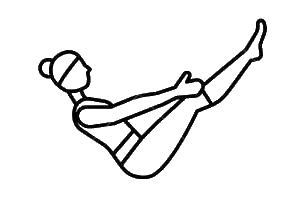
Upward Seated Forward Bend or Urdhana Paschimottanasana

Urdhva Paschimottanasana, or Upward Seated Forward Bend, is a yoga pose that combines elements of both a forward bend and a backbend. This asana provides a deep stretch to the spine, shoulders, and hamstrings, promoting flexibility and balance.

Instructions:

  1. Starting Position:
    • Sit on the floor with your legs extended straight in front of you.
    • Ensure your spine is straight, and your toes are pointing towards the ceiling.
  2. Reach Forward:
    • Inhale and extend your arms overhead, reaching towards the ceiling.
    • Lengthen your spine and engage your core as you reach forward with your fingertips.
  3. Forward Bend:
    • Exhale and hinge at your hips to bend forward from the waist.
    • Reach for your feet or shins, keeping your back straight.
  4. Arch Backward:
    • Inhale and lift your chest towards the ceiling, arching your back gently.
    • Feel the stretch across your chest and shoulders.
  5. Hold the Pose:
    • Hold the position for 30 seconds to 1 minute, breathing deeply.
    • Maintain a balance between the forward bend and the back arch.
  6. Release and Return:
    • Exhale and slowly release the pose, returning to an upright seated position.
    • Take a moment to relax and observe any sensations in your spine.

Urdhva Paschimottanasana offers a harmonious blend of forward and backward movements, providing a comprehensive stretch for the entire back of the body.

Upward Seated Forward Bend pose
Back to summary

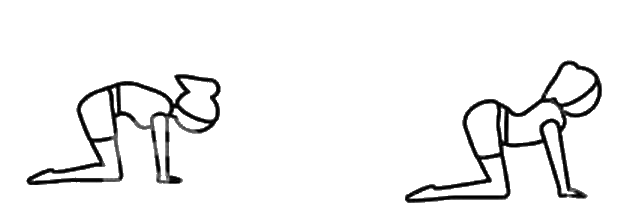
Cat pose or Marjaryasana

Marjaryasana, or Cat Pose, is a simple yet effective yoga pose that involves arching and rounding the spine. This pose helps improve flexibility in the spine, stretches the back, and provides a gentle massage to the abdominal organs.

Instructions:

  1. Starting Position:
    • Begin on your hands and knees in a tabletop position.
    • Ensure your wrists are directly under your shoulders and your knees under your hips.
  2. Arch Your Back (Cow Pose):
    • Inhale and arch your back, lifting your chest and tailbone towards the ceiling.
    • Allow your belly to sink towards the floor, creating a concave shape in your spine.
  3. Round Your Back (Cat Pose):
    • Exhale and round your back, tucking your chin towards your chest.
    • Draw your belly button towards your spine and create a convex shape in your spine.
  4. Flow Between Poses:
    • Continue to flow between the arching (Cow Pose) and rounding (Cat Pose) movements.
    • Coordinate your breath with each movement, inhaling for the arch and exhaling for the round.
  5. Repeat:
    • Repeat the sequence for 1-2 minutes, enjoying the fluidity of the movement.
    • Focus on the sensation in your spine and the gentle stretch in your back.

Marjaryasana is a wonderful pose for promoting spinal flexibility, relieving tension, and bringing awareness to the breath.

Cat pose
Back to summary

Abdominal lock or Uddiyana Bandha

Uddiyana Bandha is a yogic technique that involves the conscious contraction of the abdominal muscles. This practice helps to energize the body, improve digestion, and stimulate the solar plexus, creating a sense of lightness and vitality.

Instructions:

  1. Find a Comfortable Position:
    • Stand in a comfortable and stable position with your feet hip-width apart.
    • Place your hands on your thighs, just above your knees.
  2. Take a Deep Breath:
    • Inhale deeply through your nose, filling your lungs completely.
    • Expand your chest and abdomen as you take in the breath.
  3. Exhale Completely:
    • Exhale forcefully and completely through your mouth.
    • Empty your lungs and draw your navel towards your spine.
  4. Hold the Breath Out:
    • Hold your breath out as you pull your abdominal muscles up and towards your spine.
    • Keep your chest lifted and maintain the contraction in your abdomen.
  5. Hold the Lock:
    • Hold the Uddiyana Bandha for as long as comfortable, gradually increasing the duration over time.
    • Focus on the sensation of energy and lightness in the abdominal area.
  6. Release and Inhale:
    • Release the abdominal lock and inhale slowly and deeply through your nose.
    • Allow your breath to return to its natural rhythm.

Uddiyana Bandha is a powerful practice that should be approached with awareness and gradual progression. It can be practiced on an empty stomach and is often included as part of pranayama and hatha yoga routines.

Abdominal Lock
Back to summary

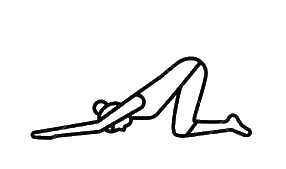
Extended Dog Pose or Utthita Svanasana

Uttana Shishosana, or Extended Dog Pose, is a yoga pose that combines elements of a forward bend and a heart opener. This asana provides a deep stretch to the spine, shoulders, and arms, promoting flexibility and relaxation.

Instructions:

  1. Starting Position:
    • Begin in a tabletop position with your hands directly under your shoulders and knees under your hips.
    • Walk your hands forward, lowering your chest towards the mat.
  2. Extend Your Arms:
    • Extend your arms forward and lower your chest towards the mat.
    • Keep your hips above your knees and your forehead or chin on the mat.
  3. Press Your Chest Down:
    • Press your chest towards the mat, creating a lengthening and opening in your upper back.
    • Keep your arms active and your palms pressing into the mat.
  4. Hold the Pose:
    • Hold the extended puppy pose for 30 seconds to 1 minute, breathing deeply.
    • Feel the stretch in your spine, shoulders, and arms.
  5. Release and Return:
    • Exhale and slowly walk your hands back towards your body, returning to a tabletop position.
    • Rest in child's pose for a moment if desired.

Uttana Shishosana is a gentle and restorative pose that helps release tension in the upper body while creating a sense of openness and relaxation.

Extended dog pose
Back to summary

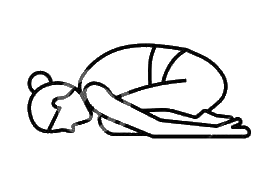
Child pose or Balasana

Balasana, or Child's Pose, is a resting yoga pose that helps release tension in the back, neck, and shoulders. It is often used as a resting position between more challenging asanas and provides a sense of grounding and relaxation.

Instructions:

  1. Starting Position:
    • Begin on your hands and knees in a tabletop position.
    • Bring your big toes together and separate your knees about hip-width apart.
  2. Sit Back:
    • Shift your hips back towards your heels while extending your arms forward on the mat.
    • Lower your chest towards the floor, allowing your forehead to rest on the mat.
  3. Arms Position:
    • Extend your arms forward with palms facing down or bring your arms alongside your body with palms facing up.
    • Choose the arm position that feels most comfortable for you.
  4. Rest and Breathe:
    • Relax in the child's pose, allowing your spine to lengthen and your breath to become steady.
    • Focus on the gentle stretch in your back and shoulders.
  5. Hold the Pose:
    • Hold the child's pose for 1-3 minutes or as long as feels comfortable.
    • Take slow and deep breaths, releasing any tension with each exhale.
  6. Return to Tabletop:
    • To exit, walk your hands back towards your body and come back to a tabletop position.
    • Rest in tabletop or move to another yoga pose as needed.

Balasana is a restorative pose that provides a moment of calm and rejuvenation, making it a valuable addition to any yoga practice.

Child pose
Back to summary

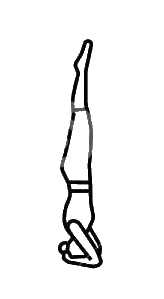
Headstand pose or Sirsasana

Sirsasana, or Headstand, is a challenging yet invigorating yoga pose that involves balancing on the head and forearms. This asana provides numerous benefits, including increased strength, improved balance, and enhanced mental focus.

Instructions:

  1. Prepare Your Space:
    • Choose a clear and open space with a non-slip surface for your practice.
    • Place a yoga mat or a soft surface to support your head and forearms.
  2. Starting Position:
    • Begin in a kneeling position on your mat.
    • Interlace your fingers and place your forearms on the mat, forming a triangle with your hands.
  3. Place Your Head:
    • Place the top of your head in the center of the triangle formed by your hands.
    • Ensure that the back of your head is cradled in your hands for support.
  4. Lift Your Hips:
    • Tuck your toes and lift your hips towards the ceiling, coming into a downward-facing dog position.
    • Walk your feet closer to your face, bringing your hips over your shoulders.
  5. Lift One Leg:
    • Slowly lift one leg towards the ceiling, keeping the other leg bent and close to your chest.
    • Engage your core and maintain a straight line from your head to the lifted leg.
  6. Extend Both Legs:
    • Once comfortable, slowly lift the second leg towards the ceiling, coming into a full tripod headstand.
    • Keep your legs together and pointed towards the ceiling.
  7. Hold the Pose:
    • Hold the tripod headstand for 15-30 seconds or as long as comfortable.
    • Focus on your breath, engage your core, and find stability in the pose.
  8. Exit the Pose:
    • Slowly lower one leg at a time, returning to the downward-facing dog position.
    • Come back to a kneeling position and rest in child's pose or another resting pose.

Sirsasana is an advanced inversion that requires strength, balance, and proper alignment. It is recommended to practice this pose under the guidance of an experienced yoga instructor.

Head Stand pose
Back to summary

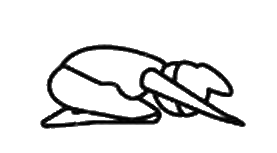
Half Tortoise pose or Ardha Kurmasana

Ardha Kurmasana, or Half Tortoise Pose, is a yoga pose that involves a forward bend with the arms stretched forward. This asana provides a stretch to the spine, shoulders, and arms, promoting relaxation and improved posture.

Instructions:

  1. Starting Position:
    • Begin in a kneeling position on your mat.
    • Keep your knees together and sit back on your heels.
  2. Extend Your Arms:
    • Extend your arms forward and bring your palms together, creating a prayer position.
    • Keep your elbows straight and engage your core.
  3. Forward Bend:
    • Inhale and lengthen your spine.
    • Exhale as you hinge at your hips and fold forward, bringing your forehead to the mat.
  4. Reach Forward:
    • Continue reaching your arms forward, maintaining the prayer position.
    • Feel a stretch in your spine, shoulders, and arms.
  5. Hold the Pose:
    • Hold Ardha Kurmasana for 30 seconds to 1 minute, breathing deeply.
    • Focus on lengthening your spine and opening your shoulders.
  6. Return to Starting Position:
    • Inhale and slowly return to the starting position, sitting back on your heels with arms relaxed.
    • Rest for a moment in a comfortable seated position.

Ardha Kurmasana is a calming pose that helps relieve tension in the upper body and promote a sense of ease and relaxation.

Halt Tortoise pose
Back to summary

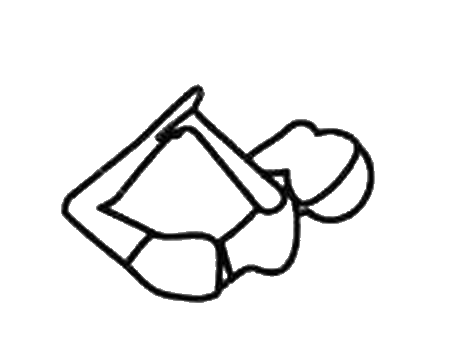
Bow pose or Dhanurasana

Dhanurasana, or Bow Pose, is a backbending yoga pose that resembles an archer's bow. This asana strengthens the back, opens the chest, and improves flexibility in the spine. It is an energizing pose that stimulates the organs and promotes a sense of vitality.

Instructions:

  1. Lie on Your Stomach:
    • Begin by lying on your stomach with your legs extended straight and arms by your sides.
    • Rest your forehead on the mat.
  2. Bend Your Knees:
    • Bend your knees and bring your heels towards your buttocks.
    • Hold your ankles with your hands, gripping the outsides of your feet.
  3. Lift Your Chest:
    • Inhale and lift your chest off the mat.
    • Simultaneously, kick your heels away from your buttocks, lifting your thighs off the mat.
  4. Arch Your Back:
    • As you continue to lift your chest and thighs, arch your back and lift your gaze forward.
    • Keep the weight on your abdomen, not just the hip bones.
  5. Hold the Pose:
    • Hold Dhanurasana for 15-30 seconds, breathing deeply.
    • Feel the stretch in your back and thighs.
  6. Release the Pose:
    • Exhale and gently release your ankles, lowering your chest and thighs back to the mat.
    • Rest in a relaxed position, such as child's pose, for a few breaths.

Dhanurasana is a powerful pose that enhances back strength and flexibility. It is advisable to practice this pose with proper guidance, especially if you are a beginner.

Bow pose
Back to summary

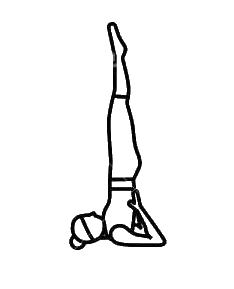
Candle pose or Sarvangasana

Sarvangasana, or Shoulder Stand, is an inverted yoga pose that involves balancing on the shoulders with the body in a straight line. This asana provides numerous benefits, including improved circulation, reduced stress, and strengthening of the upper body.

Instructions:

  1. Lie on Your Back:
    • Start by lying on your back with your arms alongside your body and palms facing down.
    • Engage your core muscles.
  2. Lift Your Legs:
    • Inhale and lift your legs off the mat, bringing them overhead towards the ceiling.
    • Support your lower back with your hands, placing them on your hips or lower back.
  3. Extend Your Legs Upward:
    • Extend your legs upward, keeping them straight and aligned with your torso.
    • Aim to create a straight line from your shoulders to your feet.
  4. Support Your Back:
    • Adjust your hands on your back to provide support and balance.
    • Keep your elbows close together on the mat.
  5. Hold the Pose:
    • Hold Sarvangasana for 30 seconds to 2 minutes, breathing deeply and steadily.
    • Focus on your breath and the alignment of your spine.
  6. Release the Pose:
    • Exhale and slowly lower your legs back down to the mat.
    • Rest in Savasana (Corpse Pose) for a few breaths.

Sarvangasana is a rejuvenating pose that offers a multitude of benefits for both the body and mind. It is recommended to practice this pose with proper guidance, especially for beginners.

Candle pose
Back to summary

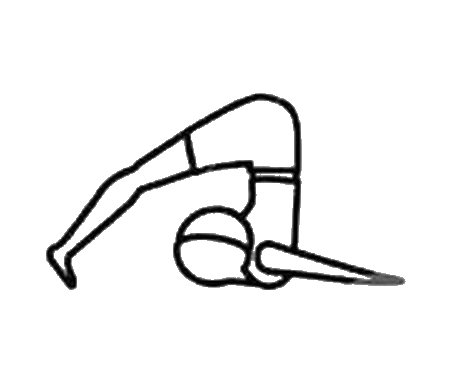
Plow pose or Halasana

Halasana, or Plow Pose, is a yoga pose that involves folding the body in half, bringing the legs over the head to touch the floor behind. This asana provides a stretch to the spine, shoulders, and hamstrings, and it is known for its calming effects on the nervous system.

Instructions:

  1. Lie on Your Back:
    • Start by lying on your back with your arms alongside your body and palms facing down.
    • Engage your core muscles.
  2. Lift Your Legs Overhead:
    • Inhale and lift your legs over your head, bringing them towards the floor behind you.
    • Support your lower back with your hands, placing them on your hips or lower back.
  3. Straighten Your Legs:
    • Straighten your legs and allow your toes to touch the floor behind you.
    • Keep your legs straight and aligned with your torso.
  4. Support Your Back:
    • Adjust your hands on your back to provide support and balance.
    • Keep your elbows close together on the mat.
  5. Hold the Pose:
    • Hold Halasana for 30 seconds to 2 minutes, breathing deeply and steadily.
    • Focus on the stretch in your spine and the opening of your shoulders.
  6. Release the Pose:
    • Exhale and slowly roll down, one vertebra at a time, until your legs are back on the mat.
    • Rest in Savasana (Corpse Pose) for a few breaths.

Halasana is a beneficial pose that enhances flexibility in the spine and promotes relaxation. It is advisable to practice this pose with proper guidance, especially for beginners.

Plow pose
Back to summary

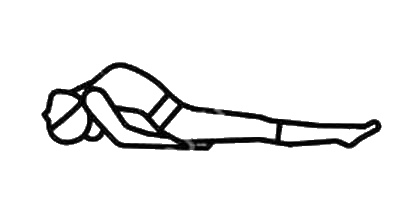
Fish pose or Matsyasana

Matsyasana, or Fish Pose, is a yoga pose that involves arching the back and opening the chest. This asana provides a stretch to the neck, throat, and chest, and it is known for its benefits in improving posture and alleviating tension in the upper body.

Instructions:

  1. Starting Position:
    • Begin by lying on your back with your legs extended and arms resting alongside your body.
    • Place your hands underneath your hips, palms facing down.
  2. Lift Your Chest:
    • Inhale and press into your forearms and elbows to lift your chest off the mat.
    • Arch your back and tilt your head backward, allowing the crown of your head to touch the mat.
  3. Support Your Chest:
    • Press your forearms and elbows firmly into the mat to support your lifted chest.
    • Allow your chest to open, lifting it towards the ceiling.
  4. Relax Your Neck:
    • Avoid putting excessive pressure on your neck; instead, let the weight be supported by your forearms.
    • Keep your neck relaxed and breathe deeply.
  5. Hold the Pose:
    • Hold Matsyasana for 15-30 seconds, breathing deeply and maintaining the arch in your back.
    • Feel the stretch in your chest and throat.
  6. Release the Pose:
    • Exhale and gently lower your chest back to the mat.
    • Extend your legs and rest in Savasana (Corpse Pose) for a few breaths.

Matsyasana is a rejuvenating pose that opens the heart center and counteracts the effects of slouching. It is suitable for practitioners of various levels.

Fish pose
Back to summary

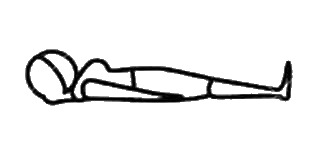
Corpse pose or Savasana

Savasana, or Corpse Pose, is a foundational yoga pose that involves lying on your back in a relaxed and meditative state. This asana is typically practiced at the end of a yoga session to promote relaxation, release tension, and integrate the benefits of the practice.

Instructions:

  1. Lie on Your Back:
    • Find a comfortable place on your mat or a soft surface.
    • Lie down on your back with your legs extended and arms resting alongside your body.
  2. Relax Your Body:
    • Close your eyes and allow your entire body to relax.
    • Release tension in your face, neck, shoulders, arms, and legs.
  3. Focus on Breath:
    • Bring your awareness to your breath.
    • Breathe naturally and observe the gentle rise and fall of your chest and abdomen.
  4. Release Mental Tension:
    • Let go of any mental tension or stress.
    • Allow your mind to become still and present.
  5. Hold the Pose:
    • Remain in Savasana for 5-10 minutes, or longer if desired.
    • Enjoy the sense of calmness and deep relaxation.
  6. Awakening:
    • When ready to conclude the pose, gently awaken your body by wiggling your fingers and toes.
    • Roll to one side and slowly come to a seated position.

Savasana is a vital part of any yoga practice, providing an opportunity for rest and rejuvenation. It is a time for complete surrender and integration of the physical and mental benefits gained during the practice.

Corpse pose
Back to summary

Diaphragmatic Breathing or Abdominal Breathing

Diaphragmatic breathing, also known as abdominal or deep breathing, is a technique that focuses on using the diaphragm to facilitate deep and mindful breaths. This form of breathing promotes relaxation, reduces stress, and enhances overall well-being.

Instructions:

  1. Find a Comfortable Position:
    • Sit comfortably in a chair or on the floor with your spine straight and shoulders relaxed.
    • Place one hand on your chest and the other on your abdomen.
  2. Inhale Through Your Nose:
    • Breathe in deeply through your nose, allowing your abdomen to expand.
    • Feel the hand on your abdomen rise while keeping the hand on your chest relatively still.
  3. Exhale Through Your Mouth:
    • Exhale slowly and completely through your mouth, feeling your abdomen contract.
    • Ensure that the hand on your chest remains relatively still.
  4. Focus on Your Breath:
    • Continue breathing deeply and rhythmically.
    • Focus on the sensation of the breath moving in and out of your body.
  5. Practice Regularly:
    • Practice diaphragmatic breathing for 5-10 minutes daily or as needed.
    • Use this technique during moments of stress or as a daily relaxation practice.

Diaphragmatic breathing is a simple yet powerful practice that can be done anywhere. It helps activate the body's relaxation response, promoting a sense of calm and balance in your daily life.

Back to summary

Thoracic Breathing or Chest Breathing

Thoracic breathing, also known as chest breathing, involves the expansion and contraction of the ribcage to facilitate breath. While diaphragmatic breathing emphasizes the movement of the diaphragm, thoracic breathing focuses on engaging the chest and upper lungs.

Instructions:

  1. Find a Comfortable Position:
    • Sit or stand comfortably with your spine straight and shoulders relaxed.
    • Place your hands on your chest, fingers interlaced or just below your collarbones.
  2. Inhale Through Your Nose:
    • Breathe in deeply through your nose, allowing your chest to expand outward.
    • Feel the rise of your chest and the expansion of your ribcage.
  3. Exhale Through Your Mouth:
    • Exhale slowly and completely through your mouth, allowing your chest to gently contract.
    • Focus on the sensation of your chest rising and falling with each breath.
  4. Coordinate with Abdominal Breath (Optional):
    • You can coordinate thoracic breathing with abdominal breathing for a complete breath cycle.
    • Feel the expansion of the chest on inhalation and the contraction on exhalation.
  5. Practice Regularly:
    • Practice thoracic breathing for 5-10 minutes, focusing on the chest's rhythmic movement.
    • Use this technique to increase awareness of your upper respiratory system.

Thoracic breathing can be a useful technique for enhancing lung capacity and increasing awareness of the chest's role in breathing. It complements diaphragmatic breathing and can be practiced as part of a mindful breathing routine.

Back to summary

Yoga Breathing or Yoga Pranayama

Full Yogic Breathing, also known as complete or three-part breathing, involves consciously using the diaphragm, chest, and clavicular region to expand the lungs fully. This breath technique enhances lung capacity, promotes relaxation, and balances the flow of energy in the body.

Instructions:

  1. Find a Comfortable Position:
    • Sit comfortably with your spine straight or lie down on your back.
    • Place one hand on your abdomen and the other on your chest.
  2. Diaphragmatic Breath:
    • Begin by inhaling deeply through your nose, allowing your abdomen to expand fully.
    • Feel the hand on your abdomen rise, indicating diaphragmatic breathing.
  3. Chest Breath:
    • Continue the inhalation, allowing your chest to expand, and feel the hand on your chest rise.
  4. Clavicular Breath:
    • Complete the inhalation by lifting your collarbones and shoulders, feeling the upper chest rise.
    • Ensure a smooth transition from diaphragmatic to chest and clavicular breathing.
  5. Exhalation:
    • Exhale slowly and completely through your nose, reversing the order: first release the chest, then the abdomen.
  6. Practice Regularly:
    • Practice Full Yogic Breathing for 5-10 minutes daily, focusing on the seamless flow of the three-part breath.
    • Use this technique for relaxation, stress reduction, and enhancing your overall breath awareness.

Full Yogic Breathing is a comprehensive breath practice that encourages a full range of motion in the respiratory system. Regular practice can contribute to improved respiratory function and a heightened sense of well-being.

Back to summary

Contact me

Back to top